Amazon Web Services (AWS) is a powerful platform for hosting your applications and services in the cloud. If you’re using AWS and need to add a port number to your server, you’ve come to the right place. In this blog post, I’ll guide you through the process in straightforward terms.
Step 0: Log into Your AWS Account
Begin by logging into your AWS account using your login credentials. This will grant you access to the AWS Management Console, where you can manage your AWS resources.

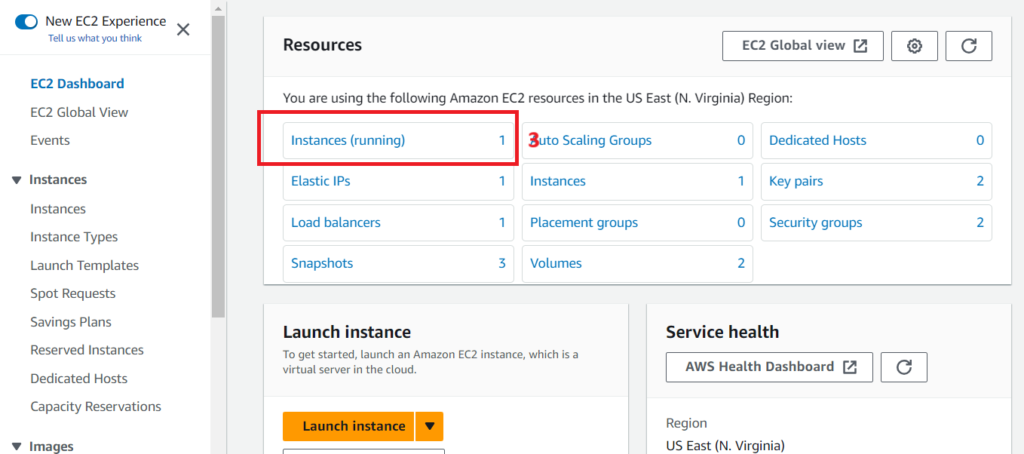
Step 1,2: Navigate to the EC2 Dashboard
The Elastic Compute Cloud (EC2) is where you manage your virtual servers, or instances, on AWS. After logging in, click on “Services” in the top-left corner, then choose “EC2” from the “Compute” section. This will take you to the EC2 Dashboard.

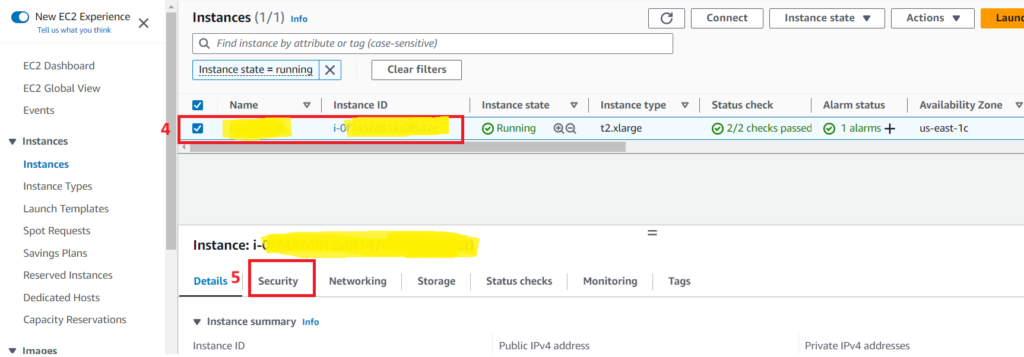
Step 3,4: Select Your EC2 Instance
From the EC2 Dashboard, locate the instance to which you want to add a port number. Click on the instance to open its details.
Step 5,6: Access Security Groups
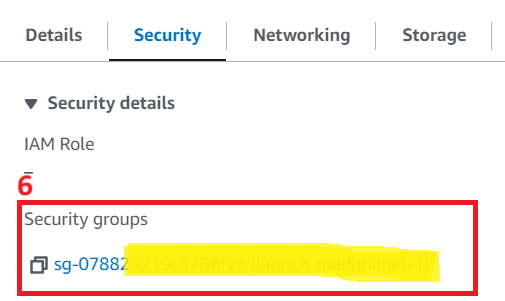
Security Groups serve as virtual firewalls for your EC2 instances, controlling incoming and outgoing traffic. To add a port number, you’ll need to modify the security group associated with your instance.
Under the “Description” tab in your instance details, you’ll find a section labeled “Security Groups.” Click on the name of the security group to view its details.
Step 7: Edit Inbound Rules
Now, it’s time to edit the inbound rules for your security group. These rules dictate which traffic is allowed to reach your instance.
Navigate to the “Inbound rules” tab and click on “Edit inbound rules.”

Step 8, 9: Add a New Rule
To add a new port number, select the “Add rule” button, which will create a new row.
In the “Type” column, choose the protocol your application uses (e.g., TCP or UDP). In the “Port range” column, enter the port number you wish to add, such as 80 for HTTP or 443 for HTTPS.
Define the Source
In the “Source” column, specify where the traffic is allowed to originate. You can enter a specific IP address or range, or, if necessary, make it accessible to the world by entering “0.0.0.0/0” (though exercise caution with this option).
Review and Save
Double-check your settings to ensure accuracy. Once you’re satisfied, click “Save rules” to implement the changes.

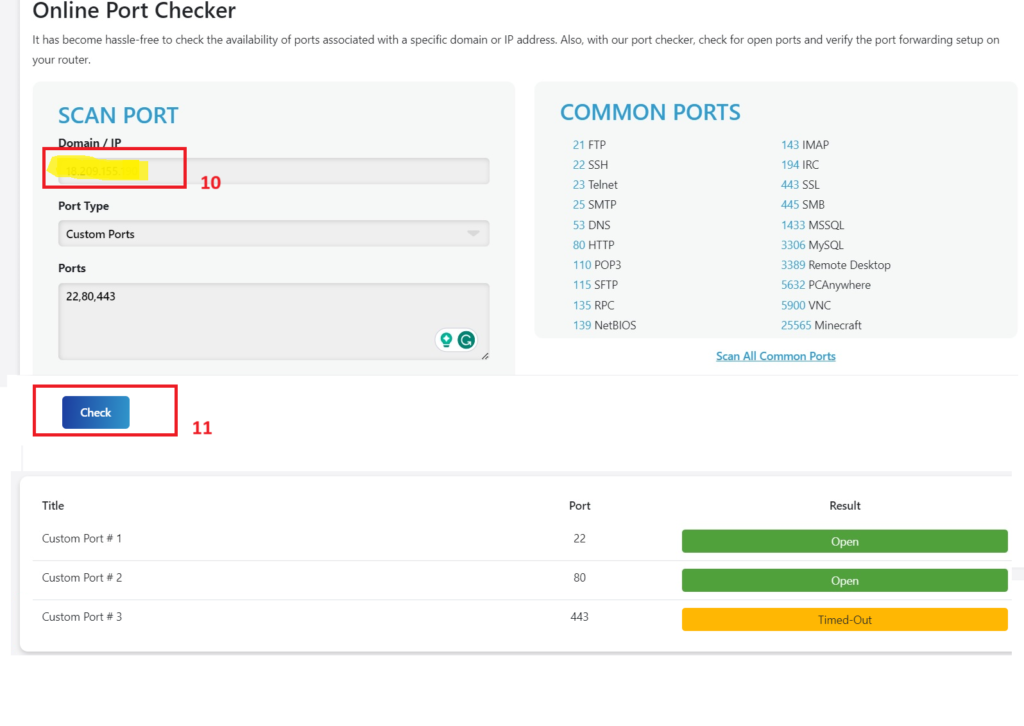
Step 10,11: Verify the Port
To confirm that the port number has been added successfully, test it with your application or use online tools to verify its accessibility.
Conclusion
Adding a port number to your AWS server is a fundamental task when configuring your applications and services. Following these straightforward steps will empower you to manage incoming traffic to your instance effectively. AWS’s user-friendly interface and adaptability make it accessible for users of all levels.
Always remember to adhere to security best practices by limiting access to your instances to trusted sources. This approach safeguards your AWS resources and ensures the seamless operation of your applications.